Like the Steve Jobs said “If you live each day as it was your last, someday you’ll most certainly be right”. So , you never know at which spur of moment your all hard work is going to be lost. It’s always a wiser choice to take complete backup of your WordPress site to deal with nightmares. There are many ways of taking backup, but the problem arrives when you have taken backup and you are not able to restore it. It may happen due to any reason such that file type in which you have compressed the backup is no longer supported or Plugin you used for the backup is outdated. One should always use tried and tested ways to make sure that restore task is possible too.
After Logging into your WordPress Dashboard, click on Plugins -> Add New .
Search for “BackWPup“, then install and activate the plugin.
- After that, you will be able to see BackWPup icon on the left pane.
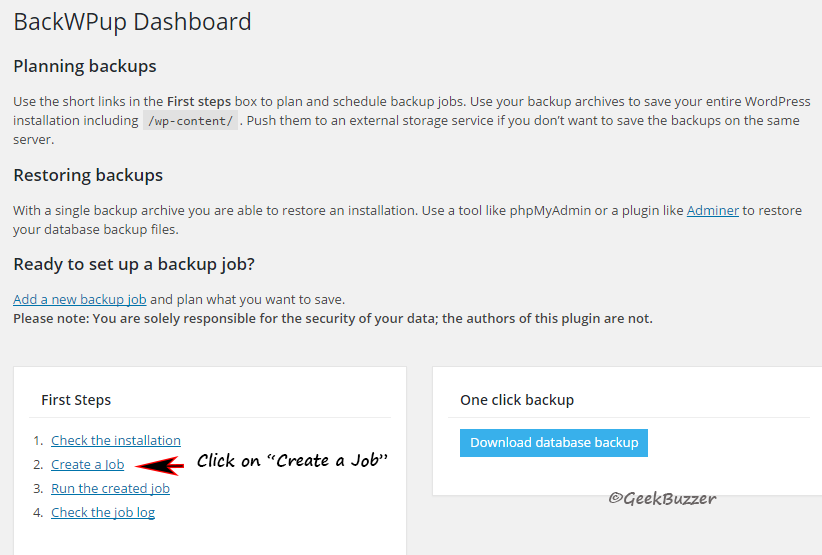
- First, check the installation to make sure that there is no error.
- Click on “Create a Job”.
General
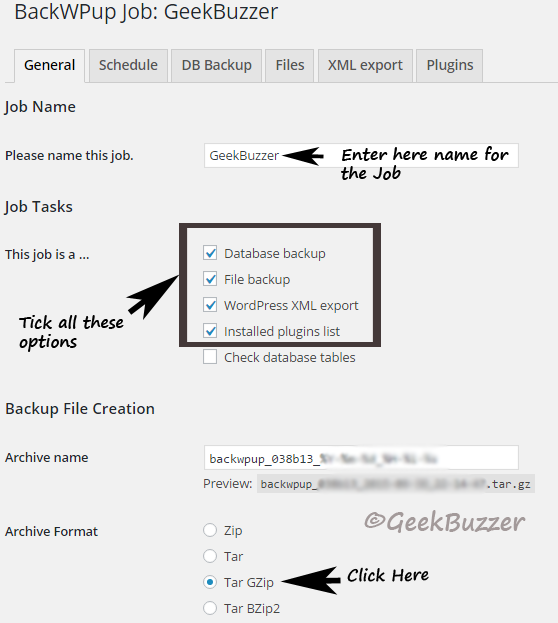
Job Name: Enter name of the job in “Please name this job” section.
Job Tasks: Tick all the options in “This Job is a …” section.
Backup File Creation: Make no changes in this section.
Job Destination
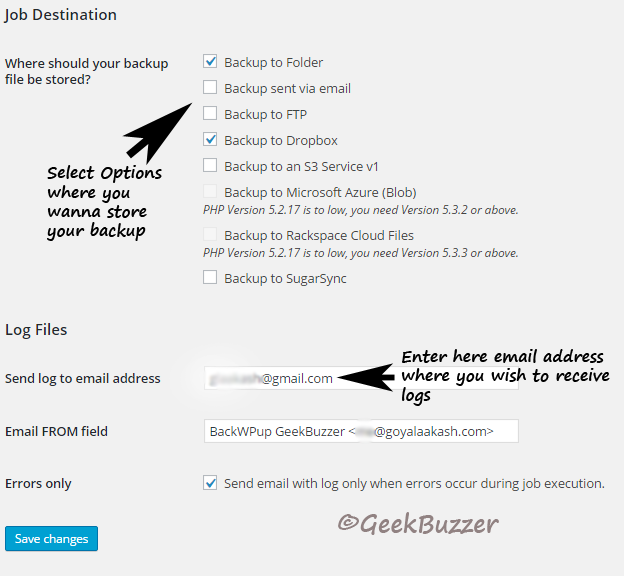
Backup to Folder: Tick this option to keep a copy of backup in a folder of your web hosting account.
Backup sent to email: This option is applicable if backup size is small such as less than or equal to 25MB.
Tick any of the cloud hosting account if you have, it’s recommended that you also upload a copy of the backup to cloud hosting sites such as Dropbox, S3, etc to ensure the availability of the file. Since email is not useful for usual backup files larger than 25MB so cloud hosting sites are a better choice.
Log files
Enter your email address where you want to receive log of jobs done in “Send log to email address“
Leave all other options in this section unchanged.
Click on “Save Changes” and proceed to next tab, i.e. “Schedule“.
Schedule
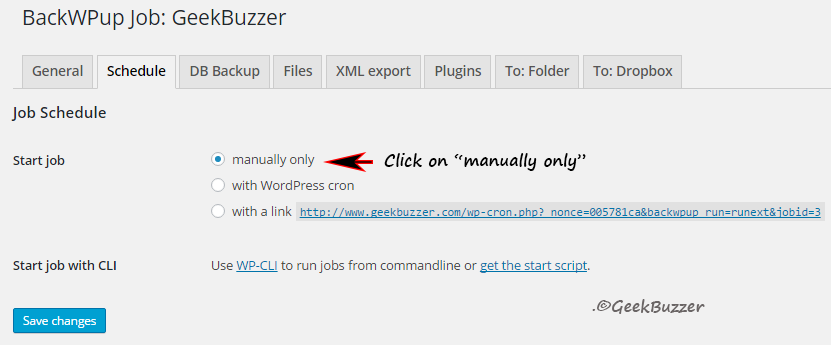
Job Schedule
Start Job: If you want to run job automatically within fixed interval of time then select “with WordPress Cron”. If you want to start manually, then select “manually only” or if you want to run job by visiting a specific link then click on “With a link”.
Leave rest of options unchanged in this section and click on “Save changes” and proceed to next tab, i.e. “DB Backup“.
DB Backup
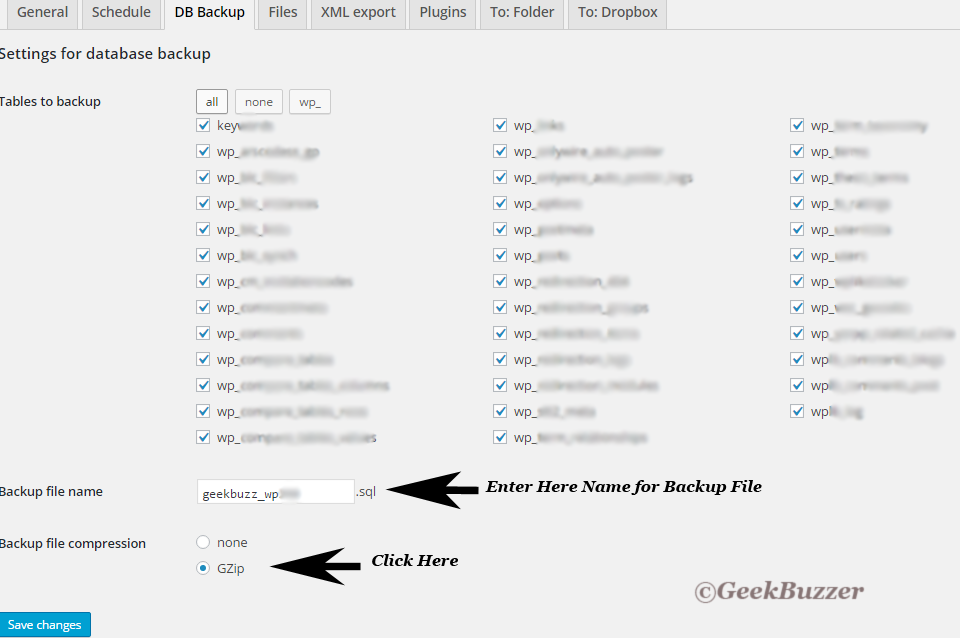
Select all option in Tables to backup.
Select backup file compression as GZip
Leave all other settings as default in this section.
click on “Save changes” and proceed to next tab i.e “Files“.
Files
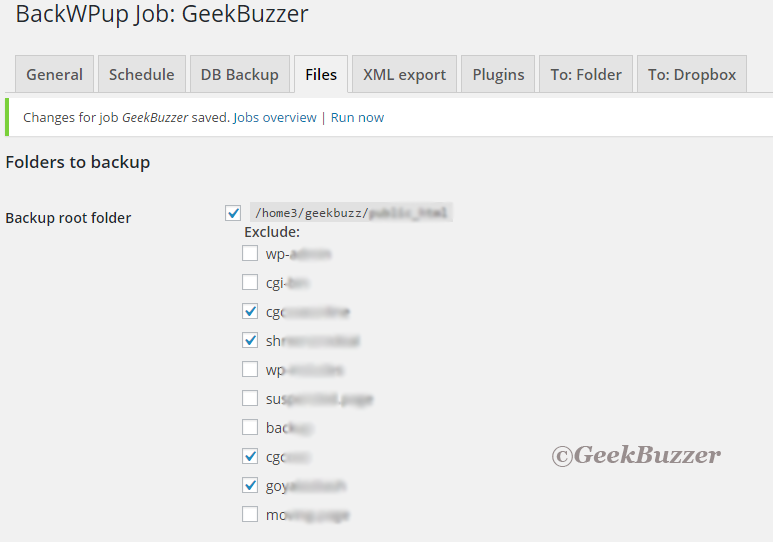
Folders to Backup: If you have multiple WordPress sites or other sites on same web hosting, then tick all the folders of other sites that you want to exclude from Backup.
Leave all options unchanged.
Click on save changes and proceed to next tab, i.e. “Plugins“.
Plugins
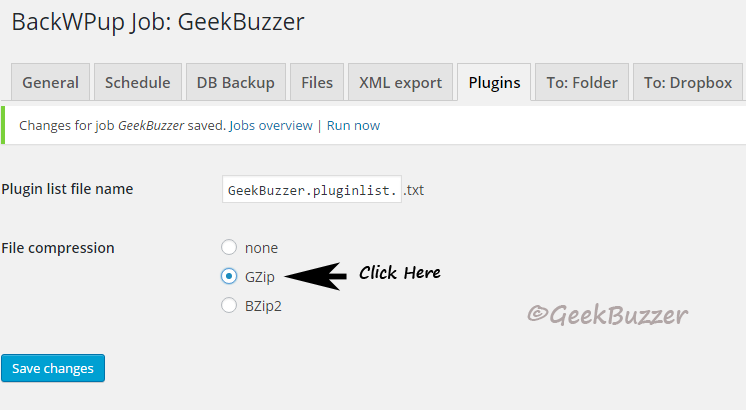
Select GZip as File Compression
and click on save changes.
After that, you will be able to see Changes for job “Whateverthenameis” saved.
Click on run now .
To: Folder
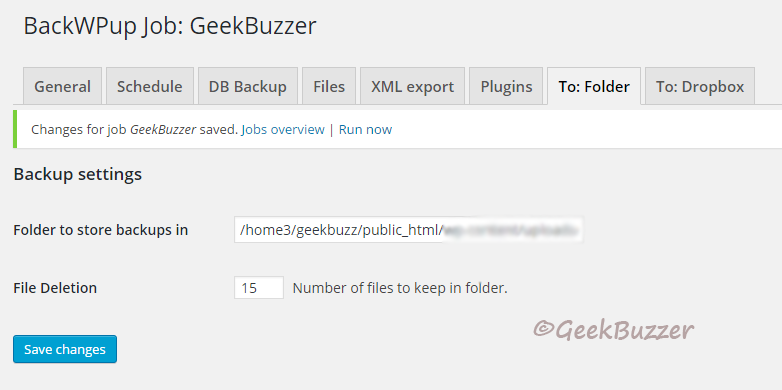
Backup settings
Nothing to change here, proceed to next step. If you want to change anything, then you can change a number of files to keep in a folder according to your desired figure.
To: Dropbox
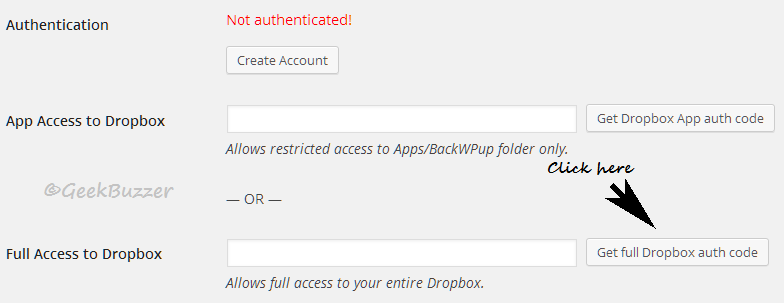
You need to authenticate BackWPup WordPress plugin with your Dropbox account. First, Click on “Get full Dropbox auth code“.
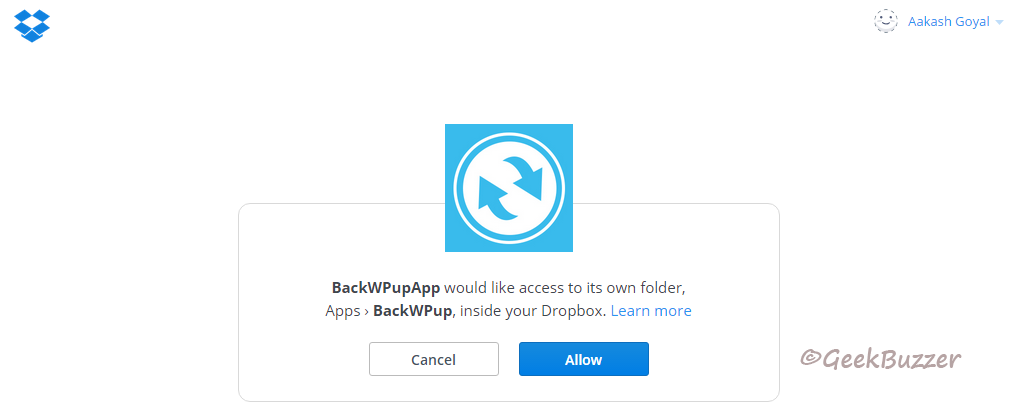
After that a pop-up will emerge in new window, Login your Dropbox account and then click on allow.
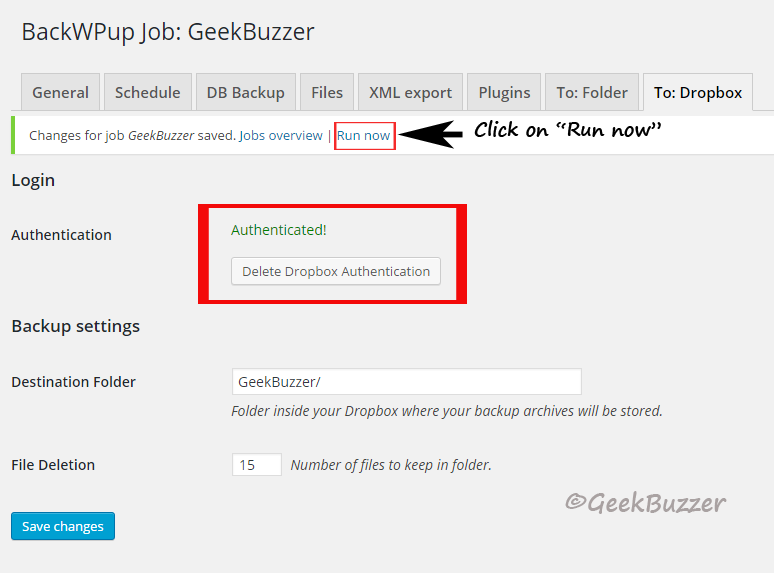
An authentication code will appear in window. Copy that code and paste it into To: Dropbox tab of BackWPup.

You have successfully authenticated with your Dropbox account, click on “Run now“.
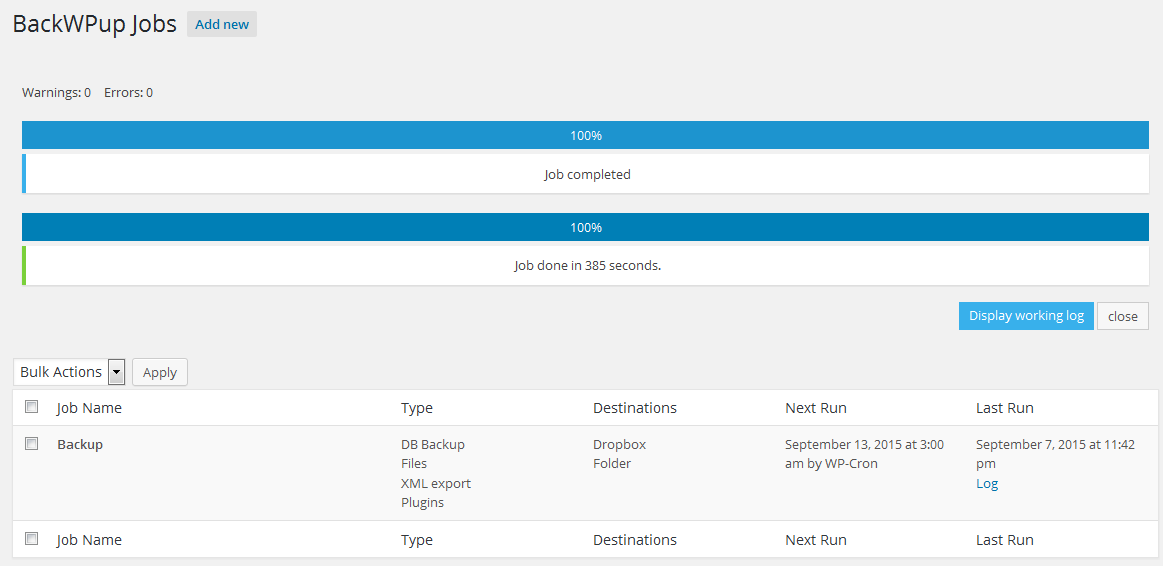
Finally after completing the whole process, Backup Job will execute and you can see its progress.
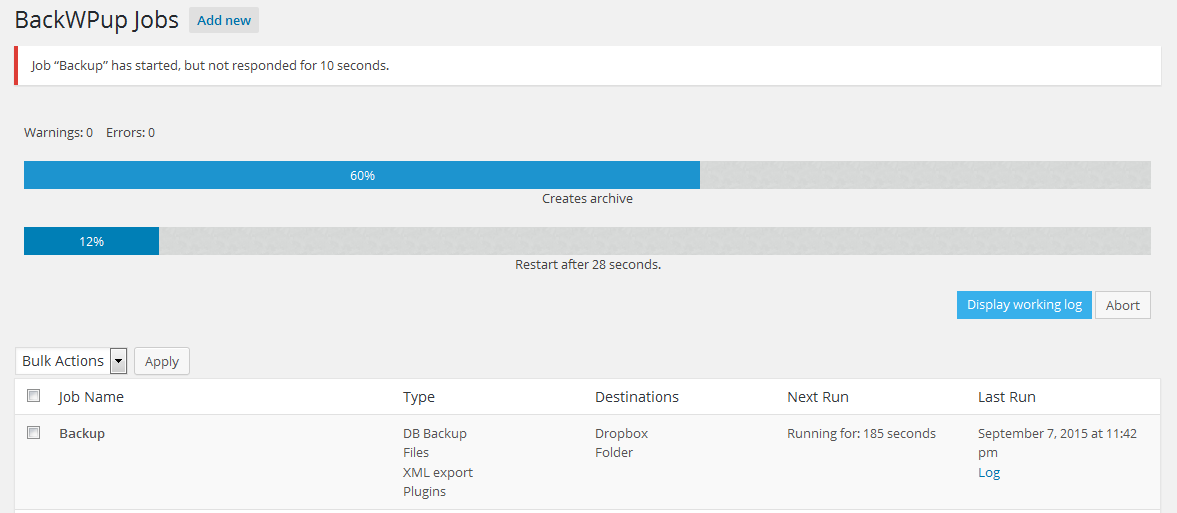
When the whole process completes, you will get notification of “Job Completed“.
So, This is how you can Backup your complete WordPress site using Backwpup plugin. You can restore database using Adminer WordPress plugin. If you need any help at any step, then do drop a line in comments.
Aakash Goyal
Latest posts by Aakash Goyal (see all)
- Demystifying Smart Shopping Campaigns - June 15, 2019
- The Definitive Guide to Czech Republic SEO - March 12, 2017
- 13 Best Points to Add in Your Content Marketing Checklist - August 8, 2016